Part 2: eksctl을 사용한 클러스터 생성
eksctl을 사용한 클러스터 생성
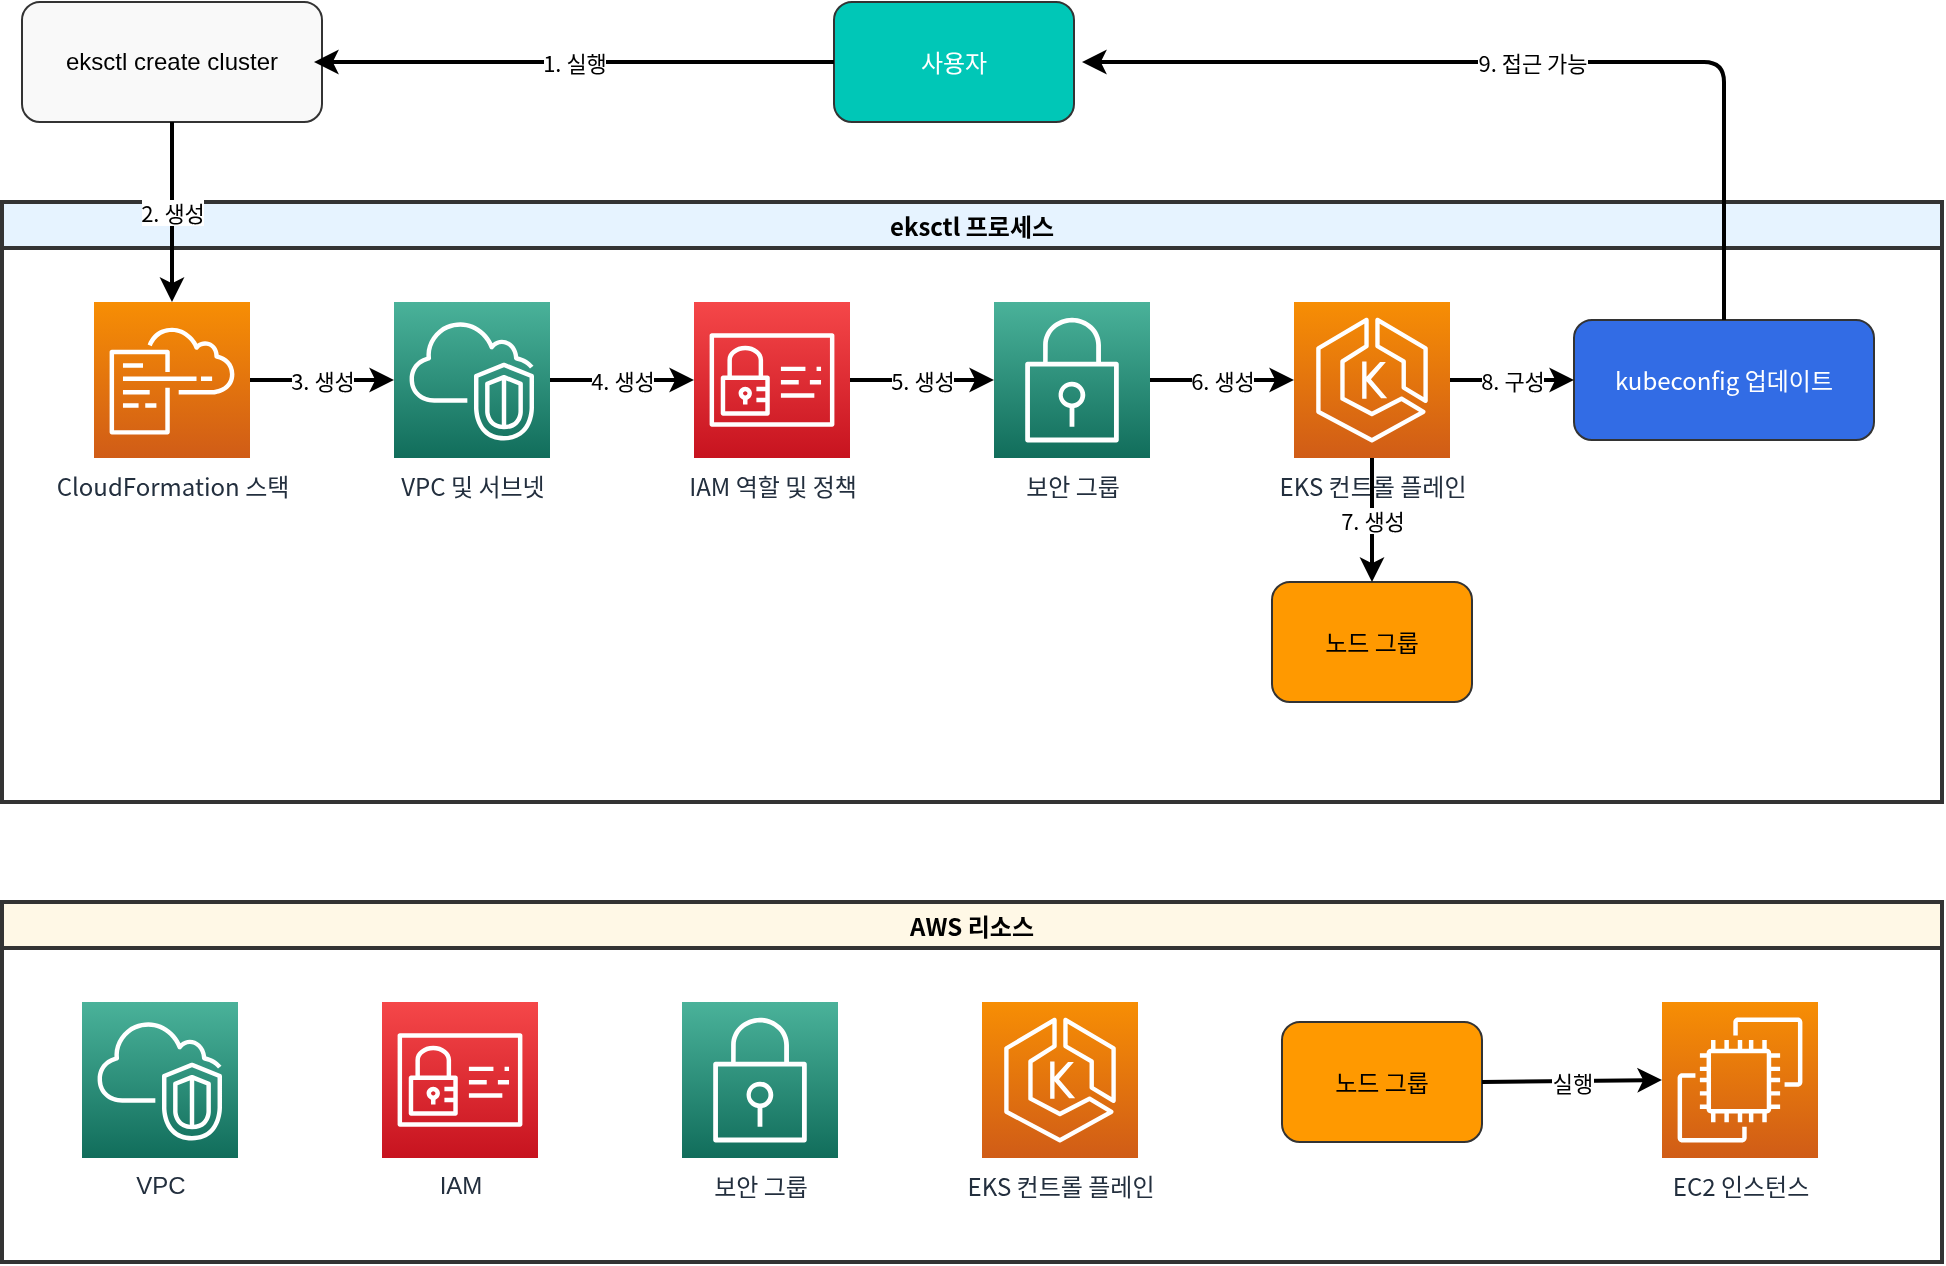
eksctl은 EKS 클러스터를 생성하고 관리하기 위한 가장 간단한 방법입니다. eksctl은 CloudFormation을 사용하여 EKS 클러스터와 관련 리소스를 생성합니다.
다음 다이어그램은 eksctl을 사용한 EKS 클러스터 생성 프로세스를 보여줍니다:
기본 클러스터 생성
가장 기본적인 형태의 EKS 클러스터를 생성하려면 다음 명령을 실행합니다:
bash
eksctl create cluster --name my-cluster --region us-west-2이 명령은 다음과 같은 기본 설정으로 클러스터를 생성합니다:
- 2개의 m5.large 노드
- 새로운 VPC 및 서브넷
- 기본 Amazon Linux 2 AMI
- 최신 Kubernetes 버전
구성 파일을 사용한 클러스터 생성
더 복잡한 구성의 경우 YAML 파일을 사용하여 클러스터를 정의할 수 있습니다:
yaml
# cluster.yaml
apiVersion: eksctl.io/v1alpha5
kind: ClusterConfig

metadata:
  name: my-eks-cluster
  region: us-west-2
  version: "1.26"

vpc:
  id: vpc-12345678
  subnets:
    private:
      us-west-2a:
        id: subnet-12345678
      us-west-2b:
        id: subnet-87654321
    public:
      us-west-2a:
        id: subnet-23456789
      us-west-2b:
        id: subnet-98765432

managedNodeGroups:
  - name: ng-1
    instanceType: m5.large
    desiredCapacity: 2
    minSize: 1
    maxSize: 3
    privateNetworking: true
    volumeSize: 80
    volumeType: gp3
    iam:
      withAddonPolicies:
        imageBuilder: true
        autoScaler: true
        externalDNS: true
        certManager: true
        appMesh: true
        ebs: true
        fsx: true
        efs: true
        albIngress: true
        xRay: true
        cloudWatch: true

  - name: ng-2
    instanceType: c5.xlarge
    desiredCapacity: 2
    privateNetworking: true
    spot: true

fargate:
  profiles:
    - name: fp-default
      selectors:
        - namespace: default
          labels:
            env: fargate
    - name: fp-kube-system
      selectors:
        - namespace: kube-system
          labels:
            k8s-app: kube-dns

cloudWatch:
  clusterLogging:
    enableTypes: ["api", "audit", "authenticator", "controllerManager", "scheduler"]
이 구성 파일을 사용하여 클러스터를 생성하려면 다음 명령을 실행합니다:
bash
eksctl create cluster -f cluster.yaml관리형 노드 그룹 생성
다음 다이어그램은 EKS 클러스터의 관리형 노드 그룹 아키텍처를 보여줍니다:
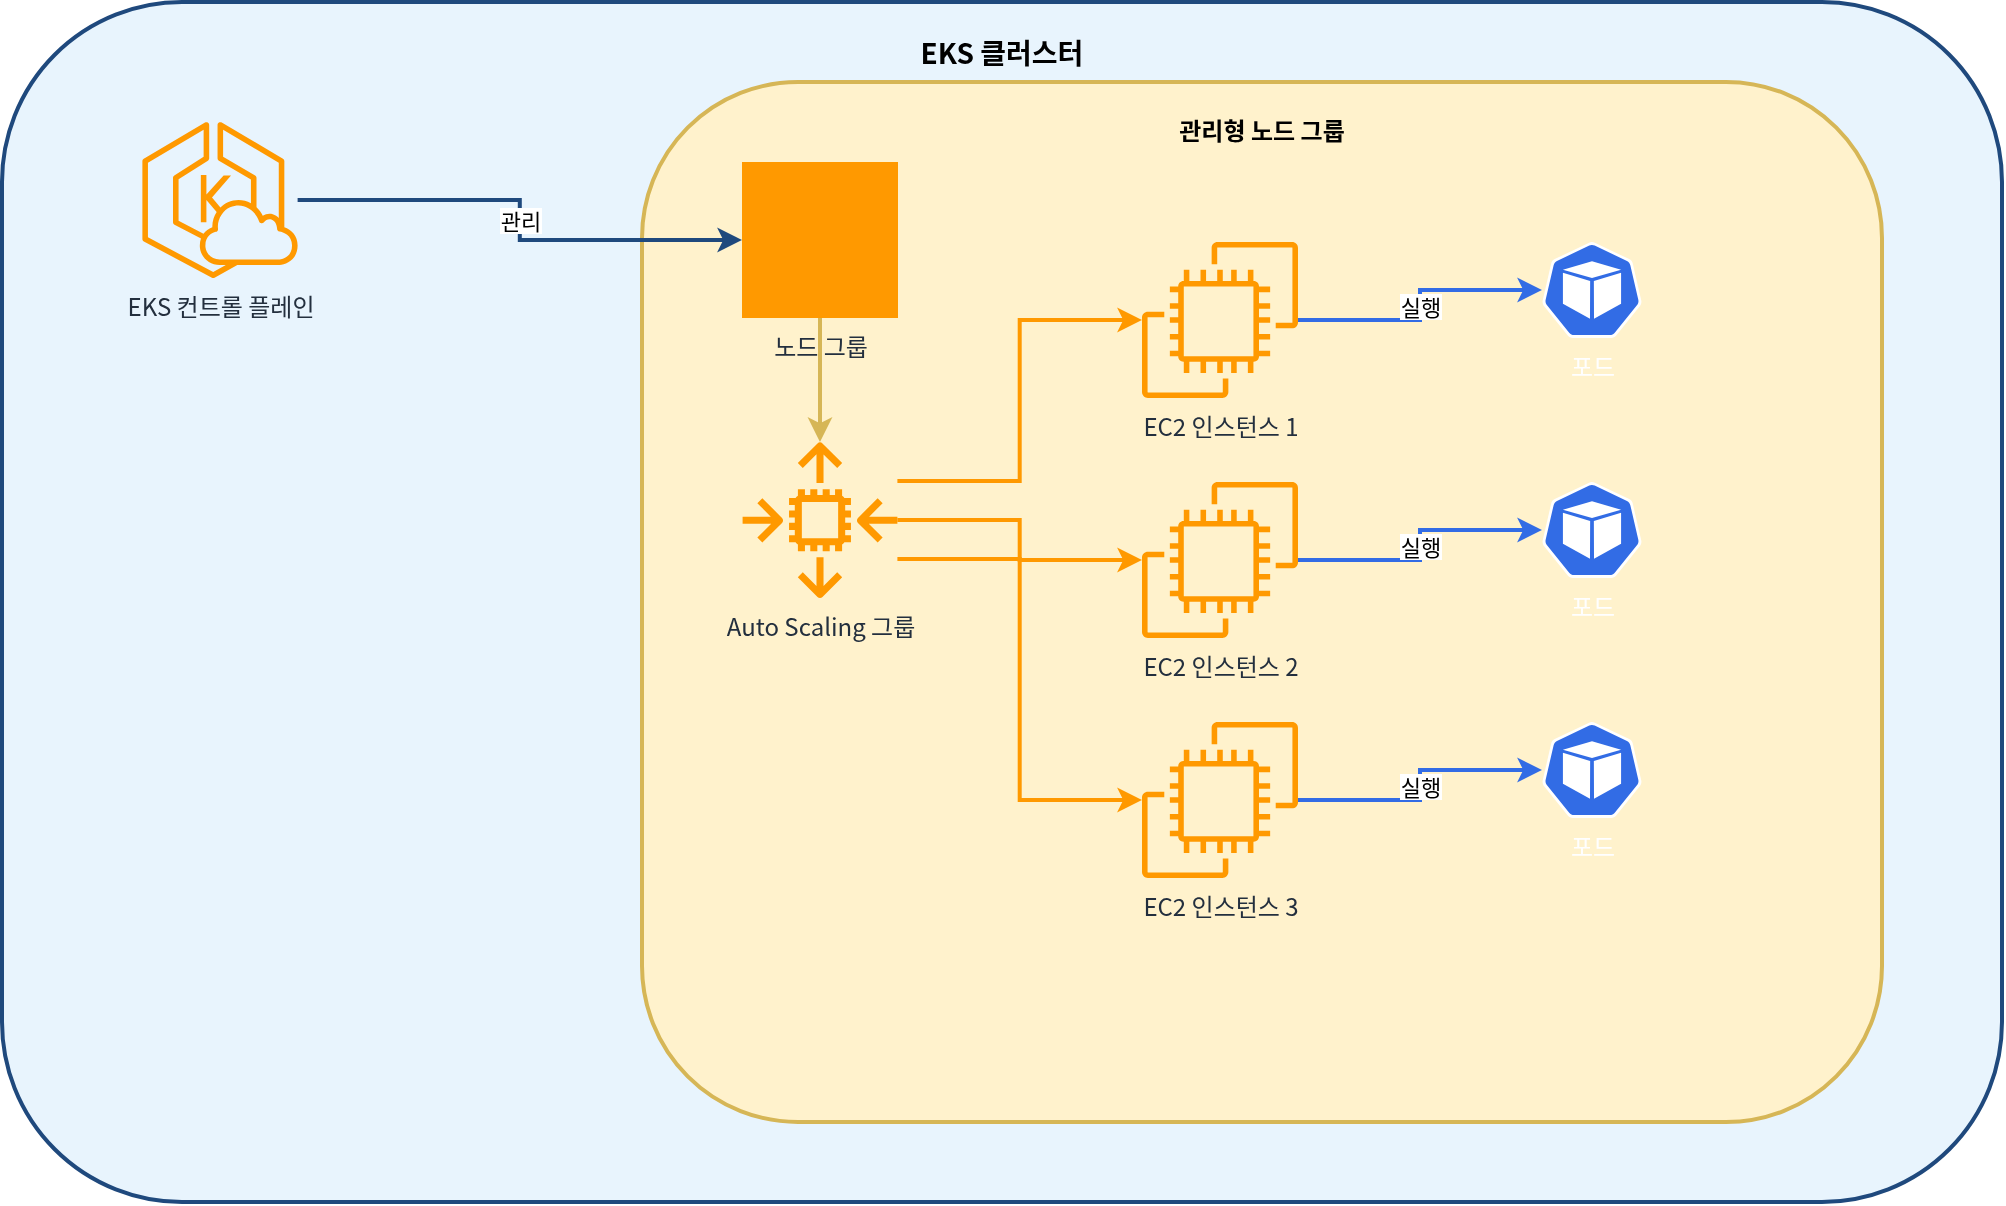
기존 클러스터에 관리형 노드 그룹을 추가하려면 다음 명령을 실행합니다:
bash
eksctl create nodegroup \
  --cluster my-cluster \
  --region us-west-2 \
  --name my-nodegroup \
  --node-type m5.large \
  --nodes 3 \
  --nodes-min 1 \
  --nodes-max 5 \
  --ssh-access \
  --ssh-public-key my-key
또는 구성 파일을 사용할 수 있습니다:
yaml
# nodegroup.yaml
apiVersion: eksctl.io/v1alpha5
kind: ClusterConfig

metadata:
  name: my-cluster
  region: us-west-2

managedNodeGroups:
  - name: my-nodegroup
    instanceType: m5.large
    desiredCapacity: 3
    minSize: 1
    maxSize: 5
    volumeSize: 80
    volumeType: gp3
    ssh:
      allow: true
      publicKeyName: my-key
bash
eksctl create nodegroup -f nodegroup.yamlFargate 프로필 생성
다음 다이어그램은 EKS Fargate 프로필 아키텍처를 보여줍니다:
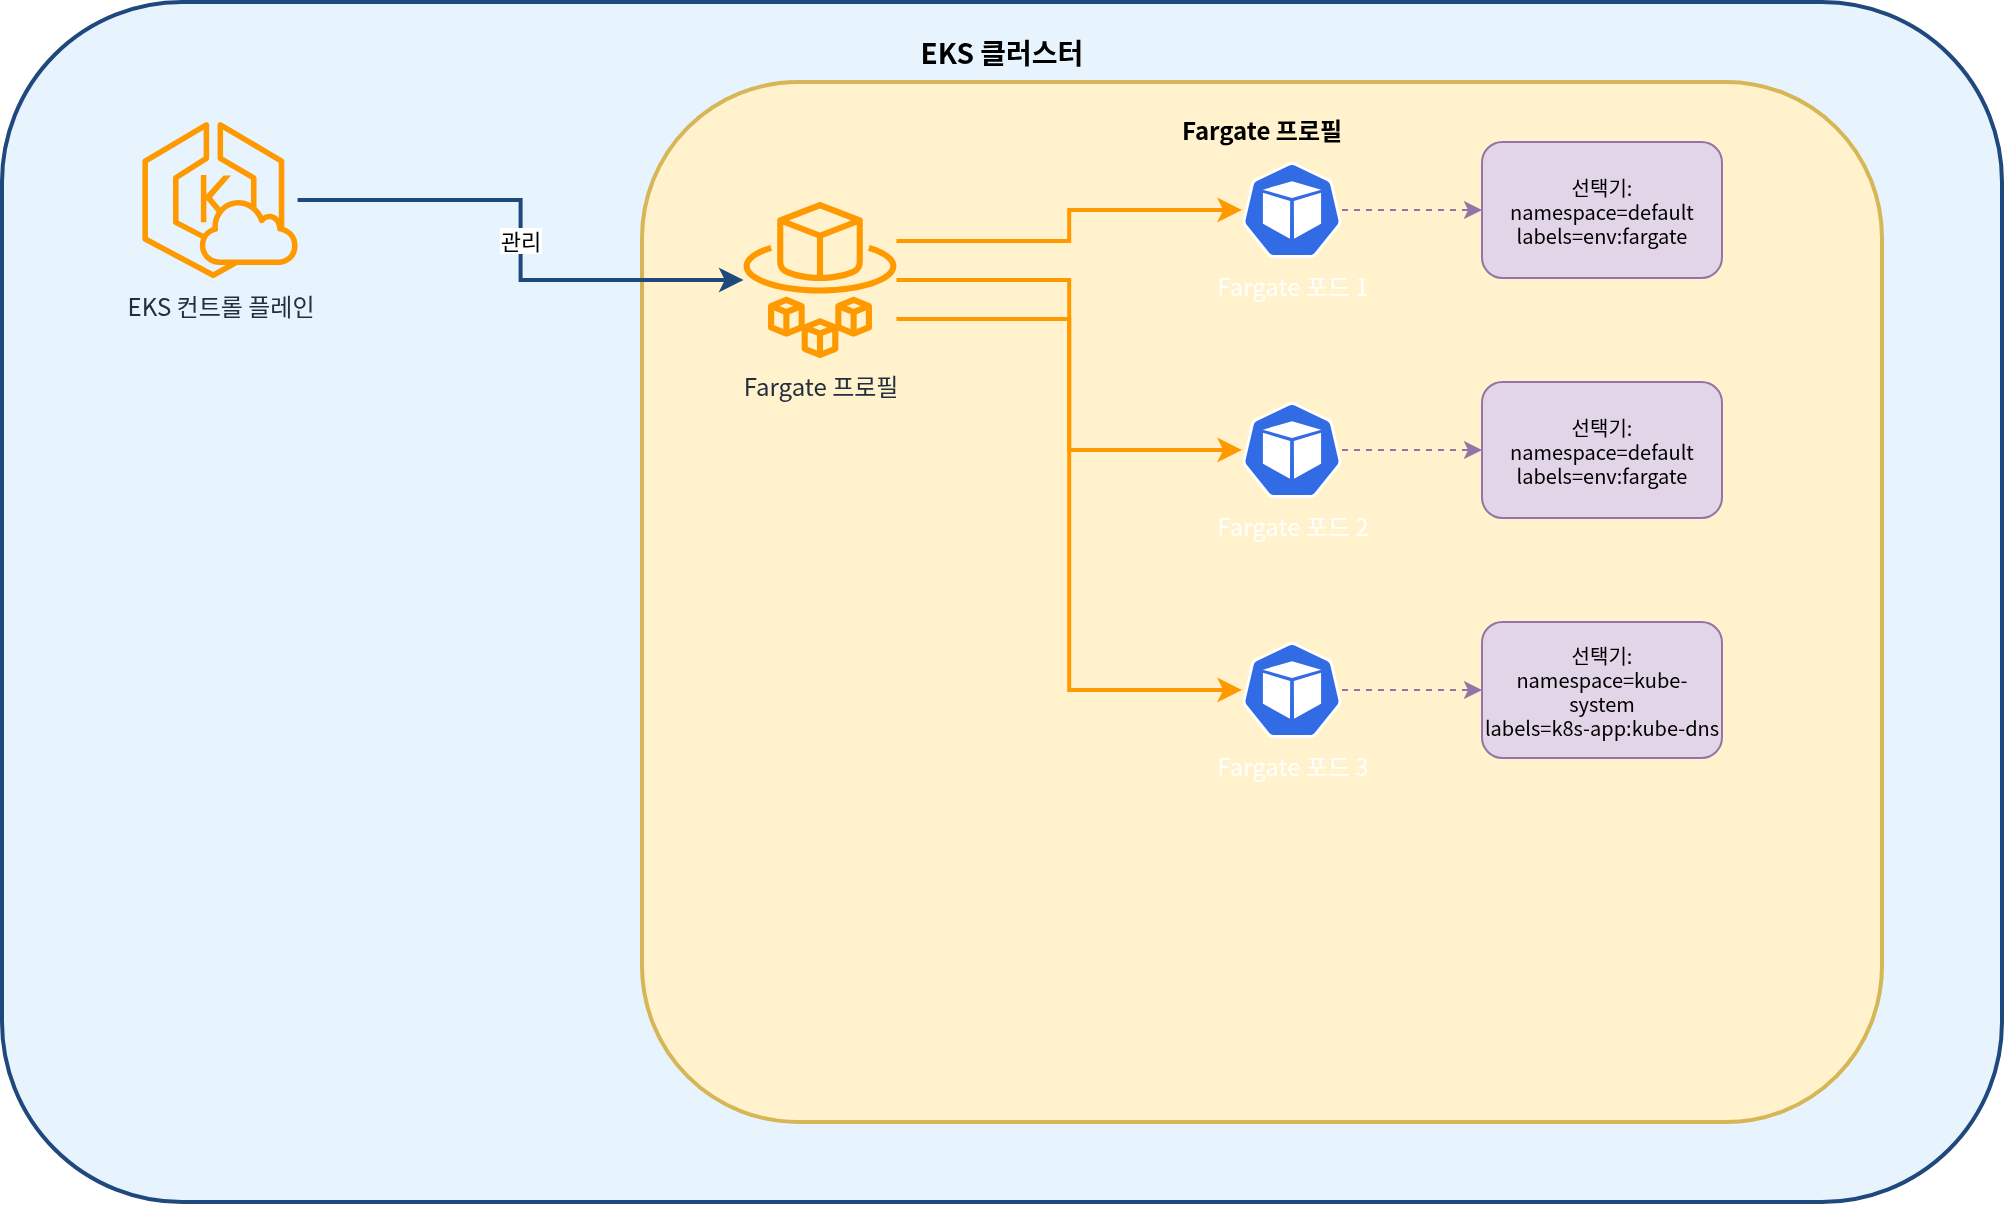
Fargate 프로필을 생성하려면 다음 명령을 실행합니다:
bash
eksctl create fargateprofile \
  --cluster my-cluster \
  --region us-west-2 \
  --name my-fargate-profile \
  --namespace default \
  --labels env=fargate
또는 구성 파일을 사용할 수 있습니다:
yaml
# fargate.yaml
apiVersion: eksctl.io/v1alpha5
kind: ClusterConfig

metadata:
  name: my-cluster
  region: us-west-2

fargate:
  profiles:
    - name: my-fargate-profile
      selectors:
        - namespace: default
          labels:
            env: fargate
bash
eksctl create fargateprofile -f fargate.yaml클러스터 업데이트
eksctl을 사용하여 기존 클러스터를 업데이트할 수 있습니다:
bash
# 클러스터 버전 업그레이드
eksctl upgrade cluster --name=my-cluster --version=1.27

# 노드 그룹 업그레이드
eksctl upgrade nodegroup --cluster=my-cluster --name=my-nodegroup
클러스터 삭제
eksctl을 사용하여 클러스터를 삭제할 수 있습니다:
bash
eksctl delete cluster --name=my-cluster --region=us-west-2EKS 클러스터 라이프사이클 관리
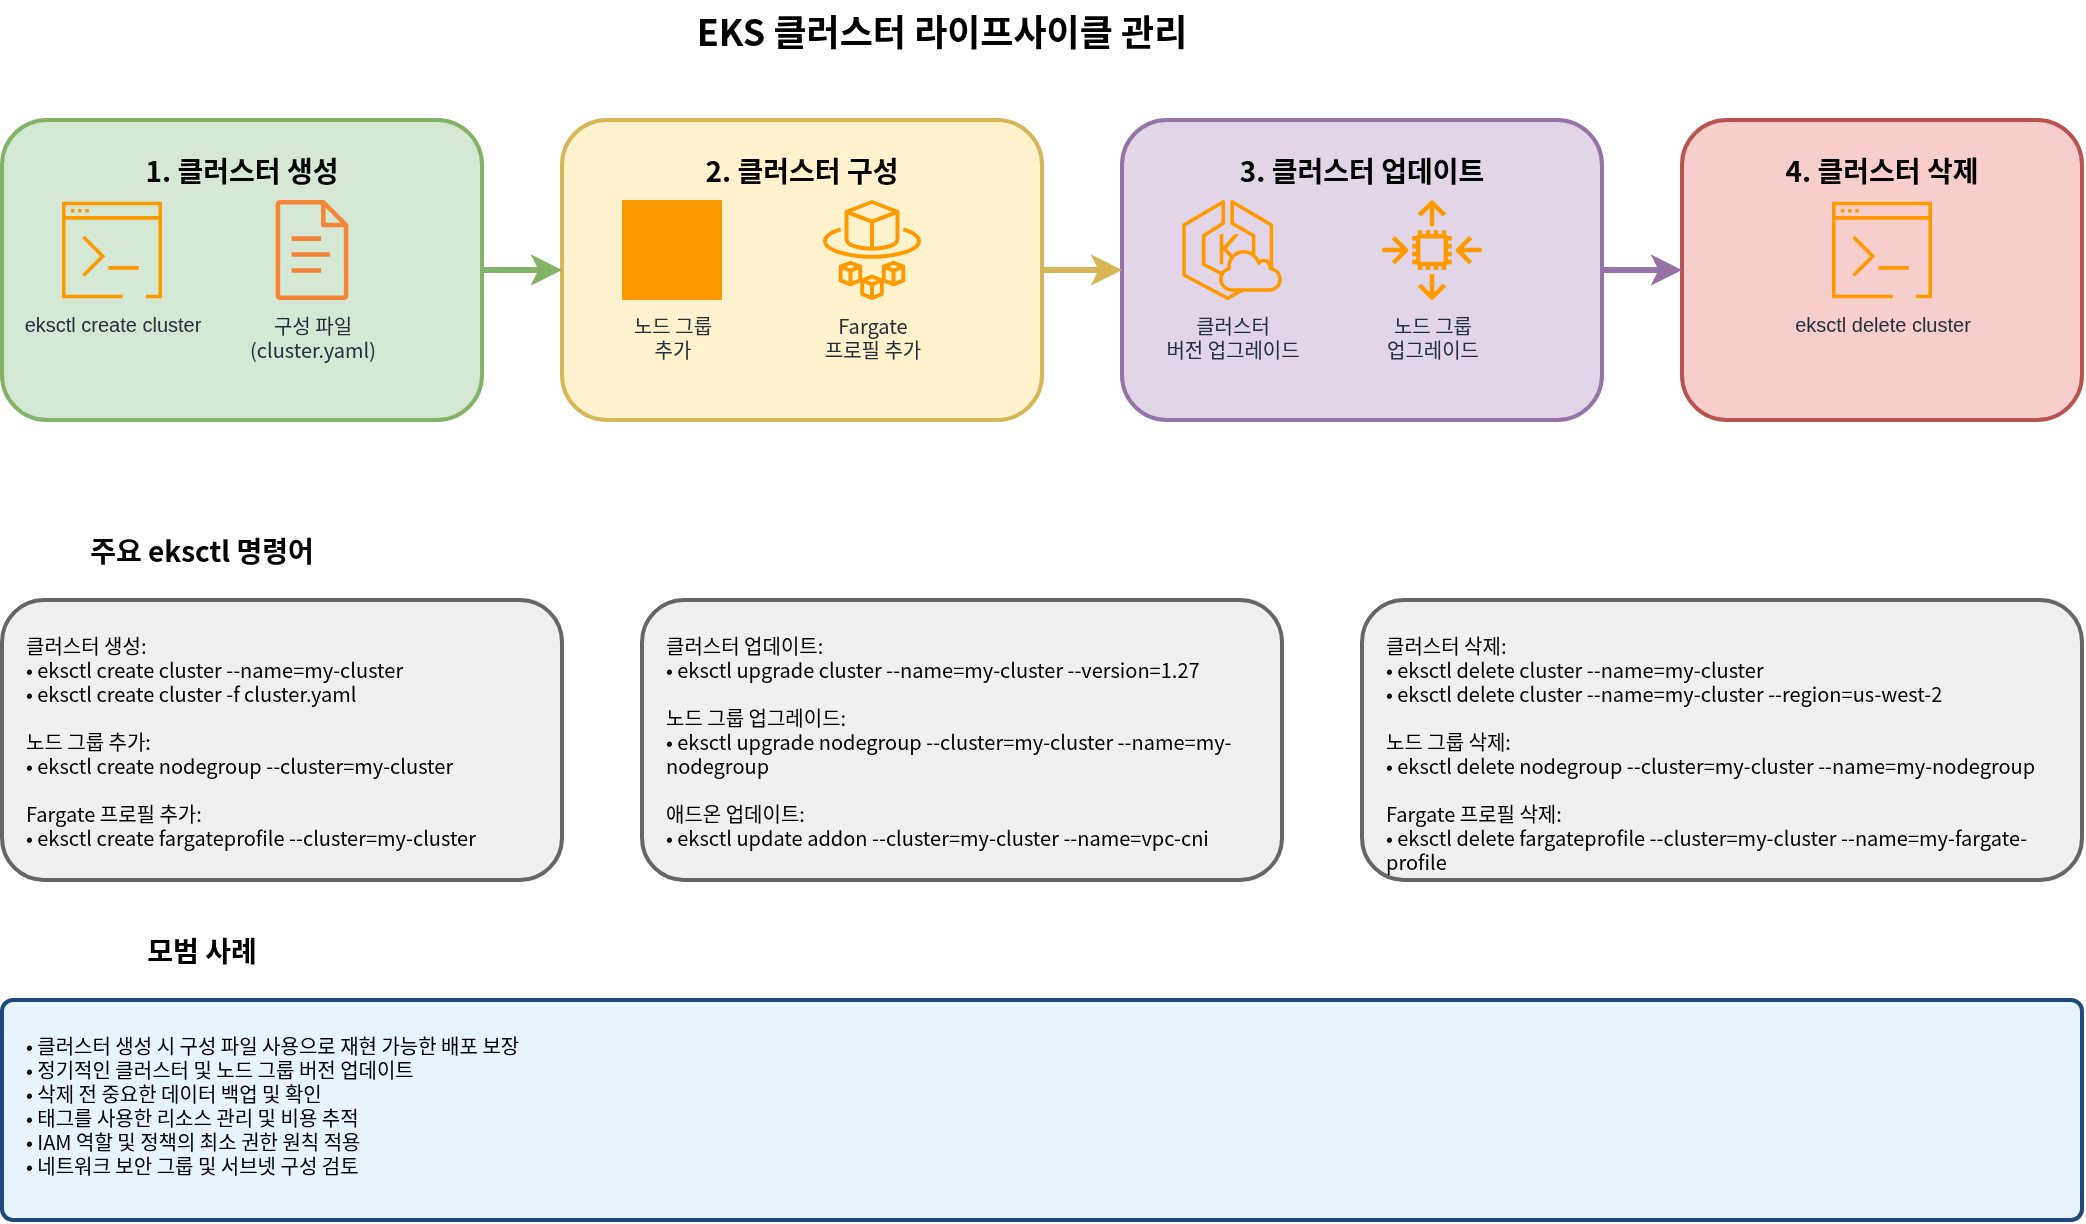
다음 다이어그램은 EKS 클러스터의 전체 라이프사이클 관리 프로세스를 보여줍니다:
퀴즈
이 장에서 배운 내용을 테스트하려면 EKS 클러스터 생성 - 2부 퀴즈를 풀어보세요.